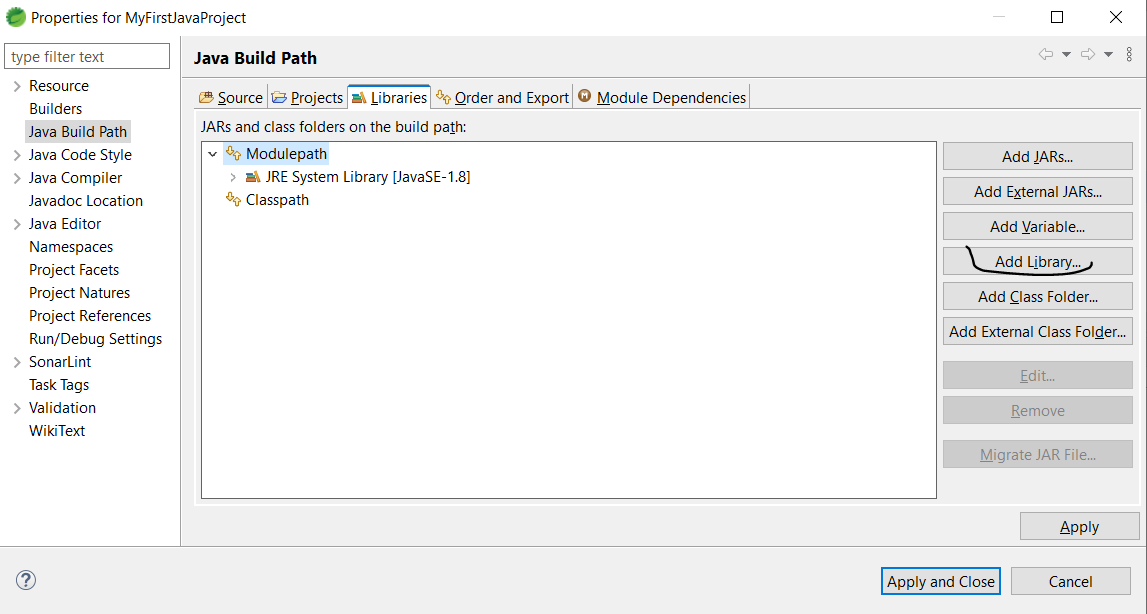
In the Java Build Path screen, select ‘Modulepath’ and click on ‘Add Library’
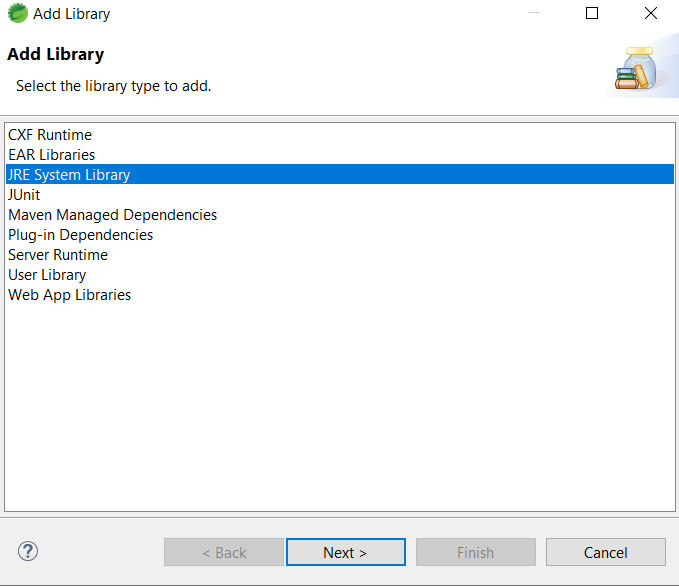
On the next screen, select JRE System Library as shown below
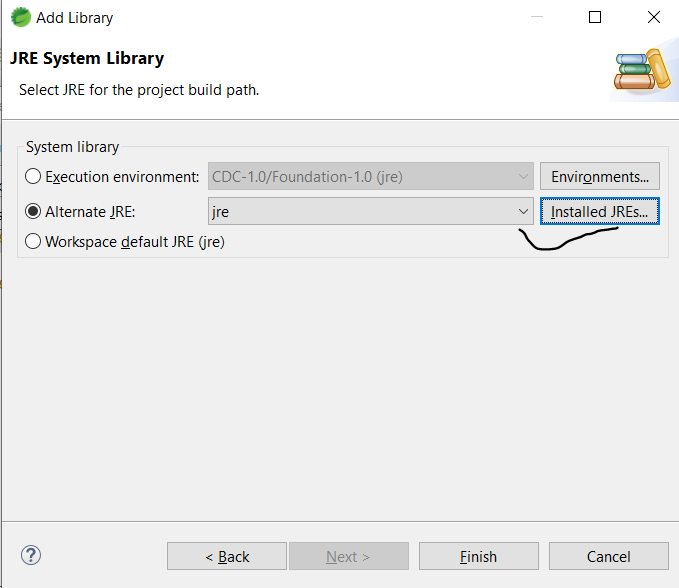
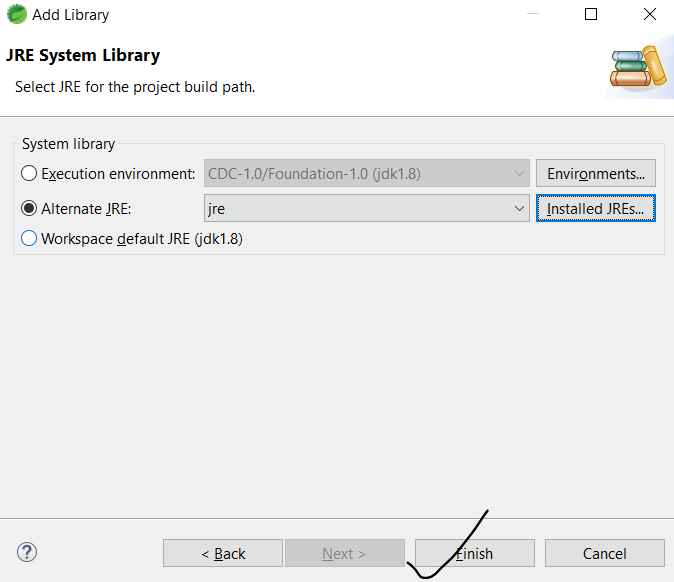
On the next screen, select ‘Alternate JRE’ and click on ‘Installed JRE’
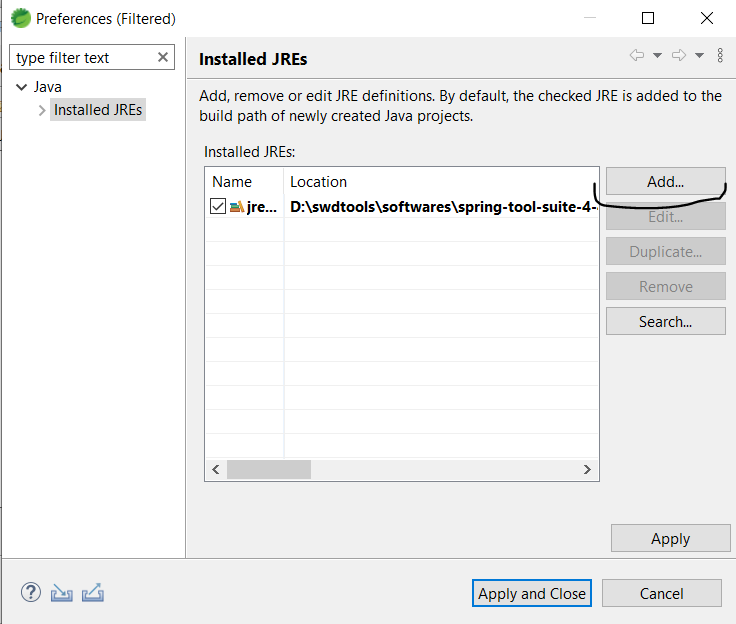
On the next screen, click on ‘Add’ button
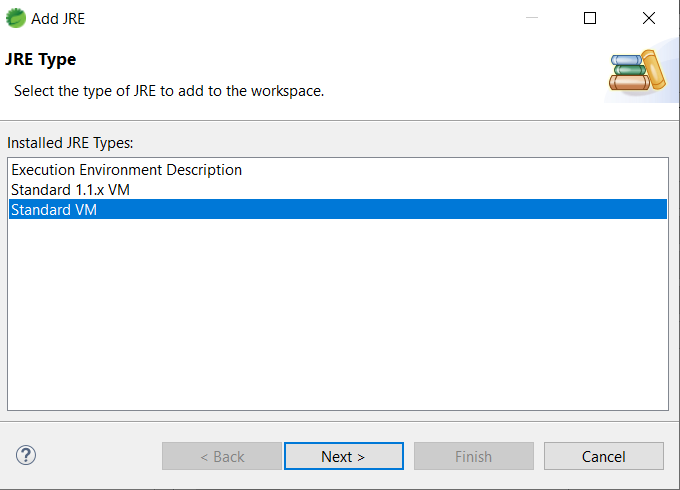
On the next screen, by default ‘Standard VM’ would come. Let it be selected. Click on ‘Next’ button
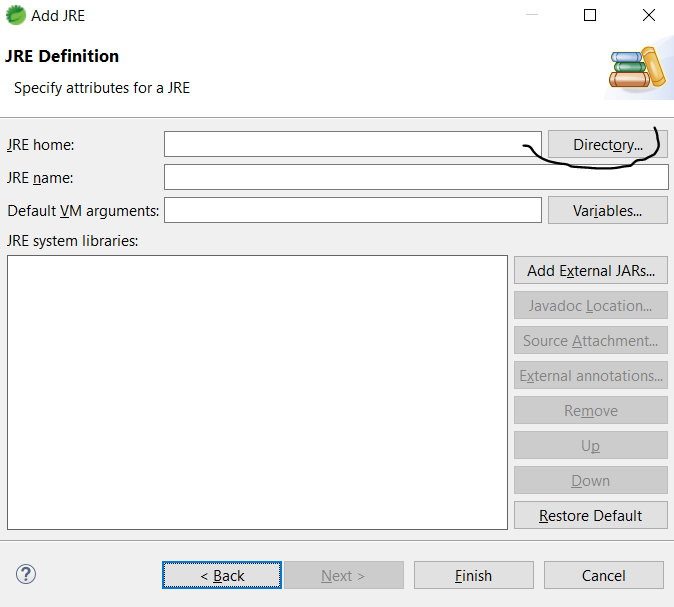
On the next screen, click on ‘Directory’ button
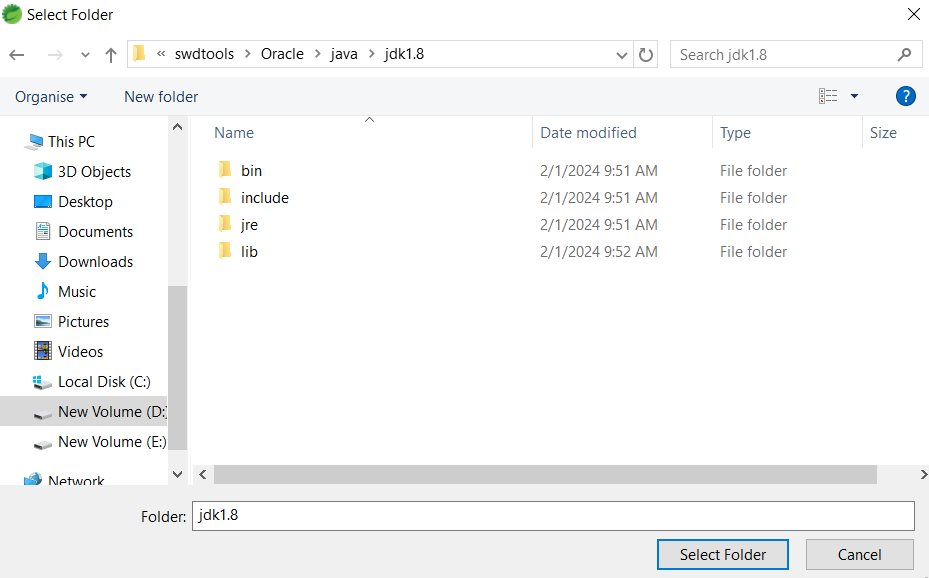
Then navigate to the folder on your machine where JDK(which you want to add in your eclipse/STS) is installed as shown below. Then click on ‘Select Folder’ button.
Note -> When you select the JDK folder, please make sure ‘bin’ folder is visible as shown below
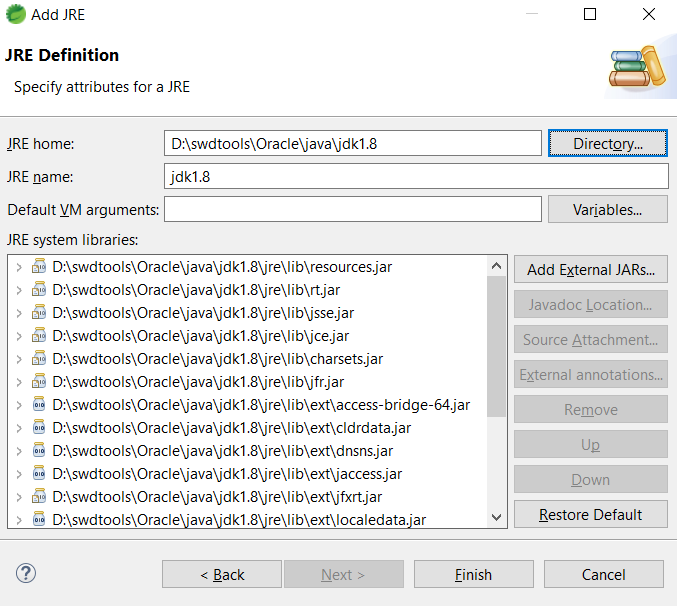
The next screen may look like below. Click on the ‘Finish’ button
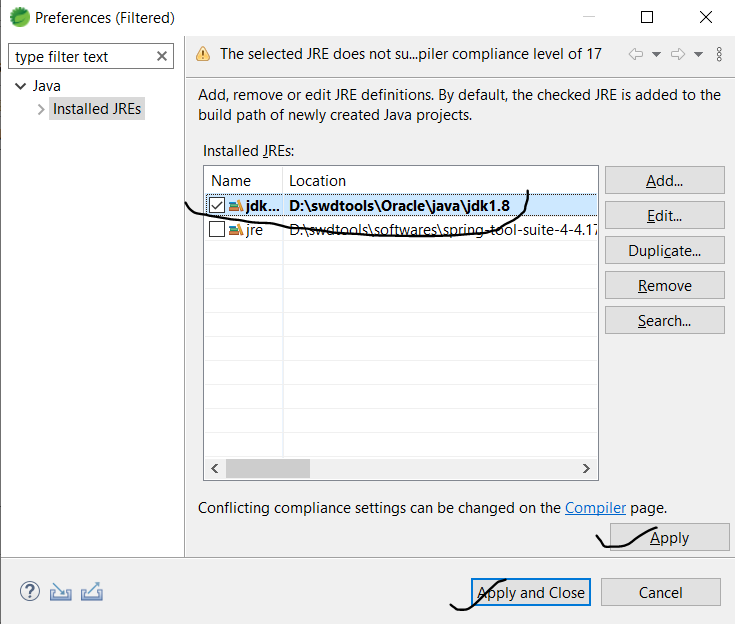
On the next screen, tick the checkbox on the recently added JDK. Then click on ‘Apply’ then ‘Apply and Close’ buttons.
On the next screen, click on the ‘Finish’ button
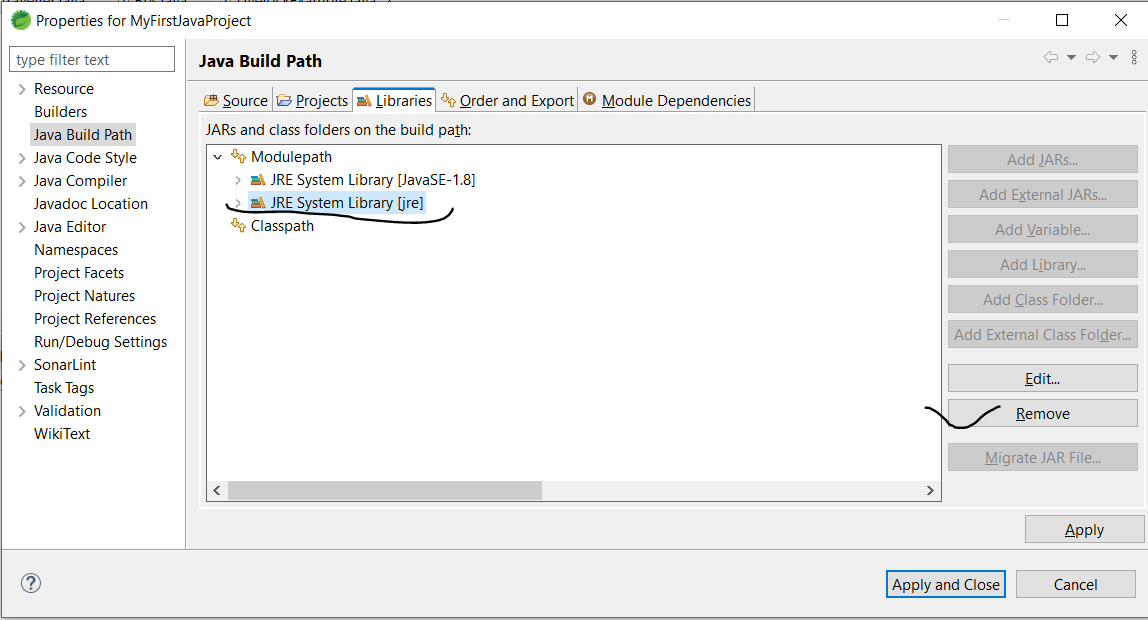
On, the last screen, remove the Eclipse/STS version of JRE. So that, it will point to the JDK that you have added
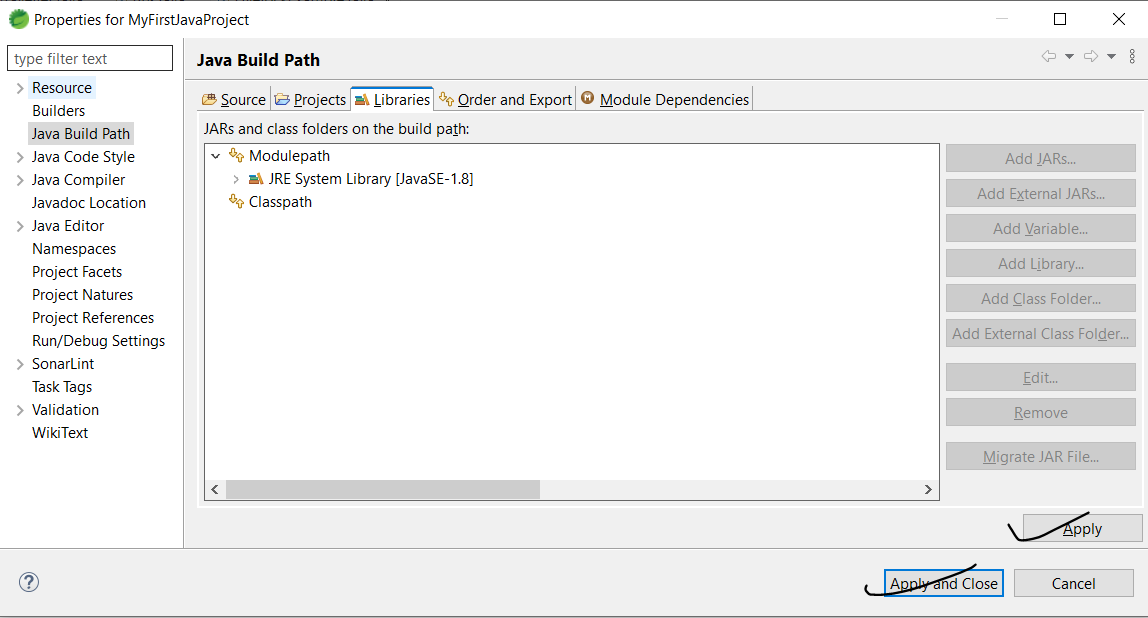
On the next screen, click on ‘Apply’ then ‘Apply and Close’
And that’s it. You’re good to go.