Spring Boot Actuator
Spring Boot Actuator brings production-ready features to our application, like, Monitoring of the app, gathering metrics information, traffic details, or the state of our database.
The main benefit of Actuator library is that we can get production-grade tools without having to actually implement these features ourselves.
The primary use of the Actuator is to expose operational information about the running application — info, health, metrics, dump, env, etc. It uses HTTP endpoints or JMX beans to enable us to interact with it.
Once this dependency is on the classpath, several endpoints are available for us to use. Like most of the Spring modules, we can easily configure or extend it in several ways.
Enabling Spring Boot Actuator
To enable actuator, we only need to add Spring Boot Acutator dependency in our pom.xml.
<dependency>
    <groupId>org.springframework.boot</groupId>
    <artifactId>spring-boot-starter-actuator</artifactId>
</dependency>
Some Actuator Endpoints
Below is the list of some actuator endpoints.
- /info – returns general information about the service
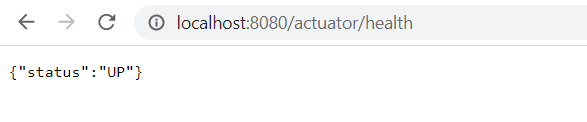
- /health – returns the health status of the service. Whether service is up and down.
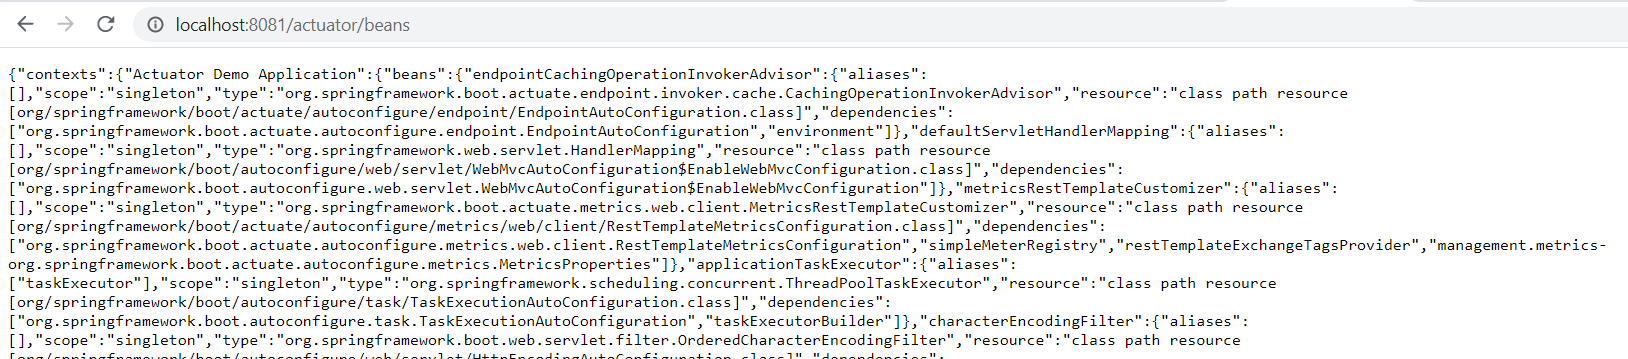
- /beans – gives info about all the beans registered with application context.
- /auditevents – audit events like login/logout etc.
- /conditions – builds a report of conditions about autoconfiguration
- /env – gives current environment properties
- /configprops – all configuration properties beans
- /logfile – appliation logs
- /loggers – enables to query or modify logging level of our application
- /heapdump – returns heap dump information
- /threaddump – thread information
- /metrics – detailed metrics of our application including memory and cpu usage
- /scheduledtasks – information about any scheduled tasks within the service
- /shutdown – shuts down the service
- /sessions – lists HttpSession objects
If our application is running on port 8080, this is how we can access the actuator endpoints
http://localhost:8080/actuator/info
http://localhost:8080/actuator/env
Spring Boot Actuator Example
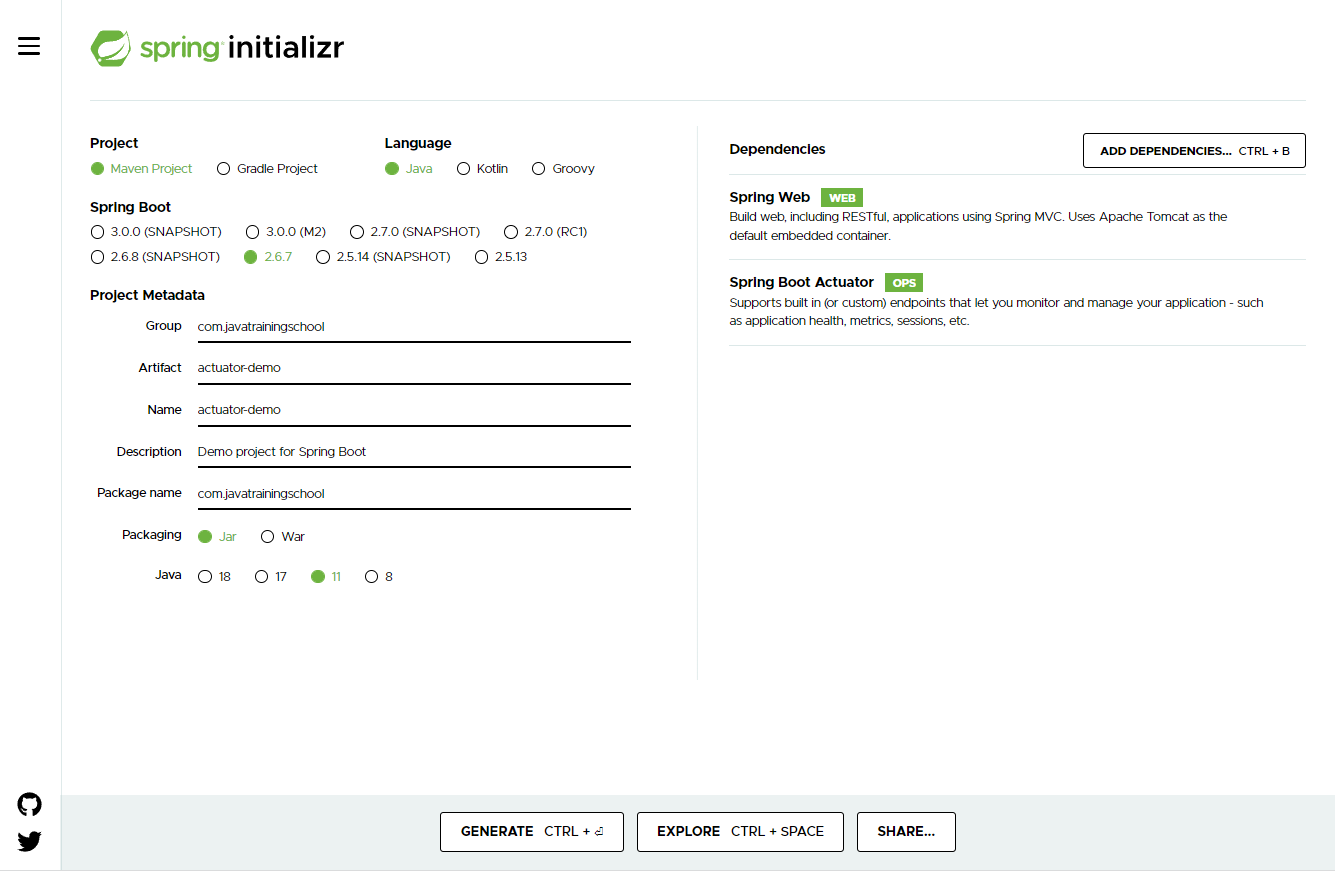
Step 1 : Let’s create one spring boot simple application. We can use STS or Spring Initializr web tool to create this app. In this example, we are going to use Spring Initializr. Refer below screenshot for various properties of the project. Add spring boot web and spring boot actuator dependencies
Step 2 : Import the project into STS. And add a rest controller class in com.javatrainingschool.controller package.
package com.javatrainingschool.controller;

import org.springframework.web.bind.annotation.GetMapping;
import org.springframework.web.bind.annotation.RestController;

@RestController
public class BasicController {

	@GetMapping("/home")
	public String home() {
		return "Welcome home";
	}

}
Step 3 : Open application.properties file and add the below properties.
In order to include actuator endpoint, use management.endpoints.web.exposure.include property.
The info endpoint is public by default and therefor you should expose only those details that are not sensitive. Let’s see how you can add data to this info API endpoint. Endpoint begining with info will be displayed when accessed via actuator/info endpoint.
spring.application.name=Actuator Demo Application
server.port=8081

management.info.env.enabled=true

management.endpoints.web.exposure.include=health,info,env,beans

info.application.name=Actuator Demo Application
info.application.description=A Demo for Spring Boot Actuator!
info.application.author.name= Saras Singh
info.application.author.bio= Java Trainer
Step 4 : Let’s run the application and test the following endpoints.