Spring boot web application + thymeleaf
In this tutorial, we will learn how to develop a web application using spring boot. It application will follow MVC approach. Let’s build this spring boot web application using STS.
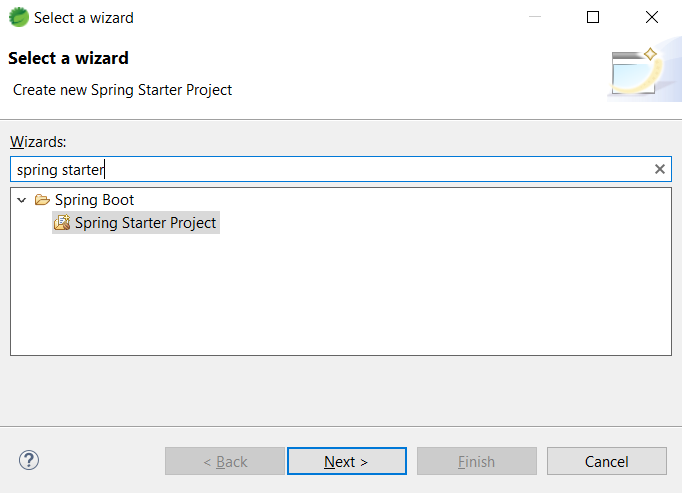
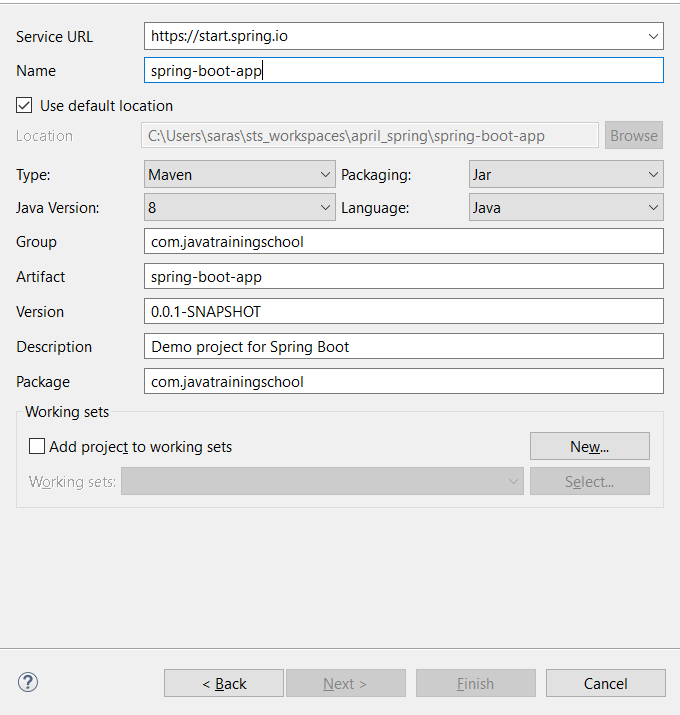
Step 1 :
Create a spring boot starter project
Step 2 :
Add below dependencies in your pom.xml file.
<dependency>
<groupId>org.springframework.boot</groupId>
	<artifactId>spring-boot-starter-web</artifactId>
</dependency>

<dependency>
	<groupId>org.springframework.boot</groupId>
	<artifactId>spring-boot-starter-data-jpa</artifactId>
</dependency>
<dependency>
	<groupId>com.h2database</groupId>
	<artifactId>h2</artifactId>
</dependency>

<dependency>
	<groupId>org.springframework.boot</groupId>
	<artifactId>spring-boot-starter-thymeleaf</artifactId>
</dependency>
Complete pom.xml
<?xml version="1.0" encoding="UTF-8"?>
<project xmlns="http://maven.apache.org/POM/4.0.0"
	xmlns:xsi="http://www.w3.org/2001/XMLSchema-instance"
	xsi:schemaLocation="http://maven.apache.org/POM/4.0.0 https://maven.apache.org/xsd/maven-4.0.0.xsd">
	<modelVersion>4.0.0</modelVersion>
	<parent>
		<groupId>org.springframework.boot</groupId>
		<artifactId>spring-boot-starter-parent</artifactId>
		<version>2.6.6</version>
		<relativePath /> <!-- lookup parent from repository -->
	</parent>
	<groupId>com.javatrainingschool</groupId>
	<artifactId>spring-boot-app</artifactId>
	<version>0.0.1-SNAPSHOT</version>
	<name>spring-boot-app</name>
	<description>Demo project for Spring Boot</description>
	<properties>
		<java.version>1.8</java.version>
	</properties>
	<dependencies>
		<dependency>
			<groupId>org.springframework.boot</groupId>
			<artifactId>spring-boot-starter-web</artifactId>
		</dependency>

		<dependency>
			<groupId>org.springframework.boot</groupId>
			<artifactId>spring-boot-starter-data-jpa</artifactId>
		</dependency>
		<dependency>
			<groupId>com.h2database</groupId>
			<artifactId>h2</artifactId>
		</dependency>

		<dependency>
			<groupId>org.springframework.boot</groupId>
			<artifactId>spring-boot-starter-thymeleaf</artifactId>
		</dependency>

		<dependency>
			<groupId>org.springframework.boot</groupId>
			<artifactId>spring-boot-starter-test</artifactId>
			<scope>test</scope>
		</dependency>
	</dependencies>

	<build>
		<plugins>
			<plugin>
				<groupId>org.springframework.boot</groupId>
				<artifactId>spring-boot-maven-plugin</artifactId>
			</plugin>
		</plugins>
	</build>

</project>
Step 3 : Add server port to application.properties file
Note that there would be a file called application.properties file under the resources folder. Add one property there. This file can be used to add more properties. It will make sure that the server runs on port 8081.
server.port=8081

Step 4 : Add thymeleaf for view
We have already added thymeleaf dependency in our pom.xml file. Also add below properties in your application.properties file.
spring.thymeleaf.enabled=true
spring.thymeleaf.cache=false
spring.thymeleaf.prefix=classpath:/templates/
spring.thymeleaf.suffix=.html

spring.application.name= Simple Spring Boot App
Step 5 : Add entity class Drink
package com.javatrainingschool.entity;

import javax.persistence.Entity;
import javax.persistence.GeneratedValue;
import javax.persistence.GenerationType;
import javax.persistence.Id;
import javax.persistence.Table;

@Entity
@Table(name = "Drink")
public class Drink {

	@Id
	@GeneratedValue(strategy = GenerationType.AUTO)
	private int id;

	private String name;
	private String type;
	private boolean alcoholic;

	public Drink() {
		super();
		// TODO Auto-generated constructor stub
	}

	public Drink(int id, String name, String type, boolean alcoholic) {
		super();
		this.id = id;
		this.name = name;
		this.type = type;
		this.alcoholic = alcoholic;
	}

	public int getId() {
		return id;
	}

	public void setId(int id) {
		this.id = id;
	}

	public String getName() {
		return name;
	}

	public void setName(String name) {
		this.name = name;
	}

	public String getType() {
		return type;
	}

	public void setType(String type) {
		this.type = type;
	}

	public boolean isAlcoholic() {
		return alcoholic;
	}

	public void setAlcoholic(boolean alcoholic) {
		this.alcoholic = alcoholic;
	}

	@Override
	public String toString() {
		return "Drink [id=" + id + ", name=" + name + ", type=" + type + ", alcoholic=" + alcoholic + "]";
	}

}
Step 6 : Add repository interface
package com.javatrainingschool.repository;

import java.util.List;

import org.springframework.data.repository.CrudRepository;

import com.javatrainingschool.entity.Drink;

public interface DrinkRepository extends CrudRepository<Drink, Integer>{

	List<Drink> findByName(String name);

}
Step 7 : Add a web controller class
Controller class has to be annotated with @Controller. This annotation makes it work like a Spring web controller.
@Value attribute fetches the value of the property spring.application.name from application.properties file in the resources folder
Model object adds an attribute called ‘appName’. Value of this attribute can be fetched in home.html file. model object is mapped with home.html file.
package com.javatrainingschool.controller;

import java.util.List;

import org.springframework.beans.factory.annotation.Autowired;
import org.springframework.http.HttpStatus;
import org.springframework.stereotype.Controller;
import org.springframework.ui.Model;
import org.springframework.web.bind.annotation.GetMapping;
import org.springframework.web.bind.annotation.ModelAttribute;
import org.springframework.web.bind.annotation.PathVariable;
import org.springframework.web.bind.annotation.PostMapping;
import org.springframework.web.bind.annotation.RequestBody;
import org.springframework.web.bind.annotation.RequestMapping;
import org.springframework.web.bind.annotation.ResponseStatus;

import com.javatrainingschool.entity.Drink;
import com.javatrainingschool.repository.DrinkRepository;

@Controller
@RequestMapping("/drink")
public class DrinkController {

	@Autowired
	private DrinkRepository drinkRepository;

	@RequestMapping("/home")
	public String home(Model model) {
		model.addAttribute("appName", "Spring boot web application.");
		return "home";
	}

	@RequestMapping("/display")
	public String displayDrinkInfo(Model model) {

		List<Drink> drinks = (List<Drink>) drinkRepository.findAll();

		model.addAttribute("drinks", drinks);
		model.addAttribute("msg", "Welcome to Drinks Menu.");

		return "displayDrink";
	}

	@GetMapping("/editForm/{id}")
	public String editForm(@PathVariable String id, Model model) {

		Drink drink = drinkRepository.findById(Integer.parseInt(id)).get();

		model.addAttribute("drink", drink);

		return "editDrink";
	}

	@RequestMapping("/edit")
	public String editDrinkInfo(@ModelAttribute Drink drink, Model model) {

		drinkRepository.save(drink);

		List<Drink> drinks = (List<Drink>) drinkRepository.findAll();

		model.addAttribute("drinks", drinks);
		model.addAttribute("msg", "Drink has been edited.");

		return "displayDrink";
	}

	@GetMapping("/addForm")
	public String addForm() {

		return "addDrink";
	}

	@PostMapping("/add")
	public String create(@ModelAttribute Drink drink, Model model) {

		drinkRepository.save(drink);

		List<Drink> drinks = (List<Drink>) drinkRepository.findAll();
		model.addAttribute("drinks", drinks);
		model.addAttribute("msg", "Drink has been added.");

		return "displayDrink";
	}

}
Step 8 : Add datasource properties for h2 database
Below is the complete application.properties file
server.port=8081
spring.thymeleaf.enabled=true
spring.thymeleaf.cache=false
spring.thymeleaf.prefix=classpath:/templates/
spring.thymeleaf.suffix=.html

spring.application.name= Simple Spring Boot App

spring.datasource.driver-class-name=org.h2.Driver
spring.datasource.url=jdbc:h2:mem:bootapp;DB_CLOSE_DELAY=-1
spring.datasource.username=sa
spring.datasource.password=

spring.jpa.defer-datasource-initialization=true
spring.jpa.show-sql=true

spring.h2.console.enabled=true
Step 9 : Add data.sql file in java/main/resources folder
insert into drink (id, name, type, alcoholic) values (101, 'Virgin Pina Colada', 'cold', false);
insert into drink (id, name, type, alcoholic) values (102, 'Pineapple punch', 'cold', true);
insert into drink (id, name, type, alcoholic) values (103, 'Aam Pana', 'cold', false);
Step 10 : Add following html files under templates folder
home.html
<!Doctype html>

<html xmlns:th="http://www.thymeleaf.org">
<head>
<title>Home Page</title>
</head>
<body>
	<h1>Hello !</h1>
	<p>
		Welcome to spring boot app - <span th:text="${appName}"></span><br><br>
		Would you like to have some drink?
		<a href="/drink/display">Try Now</a>

	</p>
</body>
</html>
displayDrink.html
<!Doctype html>

<html xmlns:th="http://www.thymeleaf.org">
<head>
<title>Display Drink Page</title>
</head>
<body>

	<h1>Drinks Menu</h1><br>
	<div th:text="${msg}">  </div><br>
	<table border="2" width="70%" cellpadding="2">
		<tr>
			<th>Id</th>
			<th>Drink Name</th>
			<th>Drink Type</th>
			<th>Edit</th>
		</tr>
		<tr th:each="drink: ${drinks}">
				<td th:text="${drink.id}"></td>
				<td th:text="${drink.name}"></td>
				<td th:text="${drink.type}"></td>
				<td><a th:href= "@{'/drink/editForm/' + ${drink.id}}">Edit</a></td>
			</tr>
		</th:forEach>
	</table>
	<br />
	<a th:href="@{/drink/addForm}">Add a Drink</a>
</body>
</html>
addDrink.html
<!Doctype html>

<html xmlns:th="http://www.thymeleaf.org">
<head>
<title>Add Drink Page</title>
</head>
<body>
	<form th:action="@{/drink/add}" th:object="${drink}" th:method="POST">
		<h1>Add Drink</h1>
		<br>
		<table border="2" width="70%" cellpadding="2">
			<tr>
				<td>Drink Name</td>
				<td><input type="text" th:name="name"></td>
			</tr>
			<tr>
				<td>Drink Type</td>
				<td><input type="text" th:name="type"></td>
			</tr>
			<tr>
				<td>Is Drink Alcoholic</td>
				<td><input type="checkbox" th:name="alcoholic"></td>
			</tr>

		</table>
		<br /> <input type="submit" value="Add Drink">
	</form>
</body>
</html>
editDrink.html
<!Doctype html>

<html xmlns:th="http://www.thymeleaf.org">
<head>
<title>Edit Drink Page</title>
</head>
<body>
	<form th:action="@{/drink/edit}" th:object="${drink}" th:method="POST">
		<h1>Edit Drink</h1>
		<br>
		<table border="2" width="70%" cellpadding="2">
			<tr>
				<td>Drink ID</td>
				<td th:text="${drink.id}"></td>
				<td>New ID</td>
				<td><input type="number" th:field="*{id}" th:value="${drink.id}"></td>
			</tr>
			<tr>
				<td>Drink Name</td>
				<td th:text="${drink.name}"></td>
				<td>New Name</td>
				<td><input type="text" th:name="name"></td>
			</tr>
			<tr>
				<td>Drink Type</td>
				<td th:text="${drink.type}"></td>
				<td>New Type</td>
				<td><input type="text" th:name="type"></td>
			</tr>
			<tr>
				<td>Is Drink Alcoholic</td>
				<td th:text="${drink.alcoholic}"></td>
				<td>New Value</td>
				<td><input type="checkbox" th:name="alcoholic" th:checked="${drink.alcoholic} ? 'checked'"></td>
			</tr>

		</table>
		<br /> <input type="submit" value="Edit Drink">
	</form>
</body>
</html>
Step 11 : Run and test the application
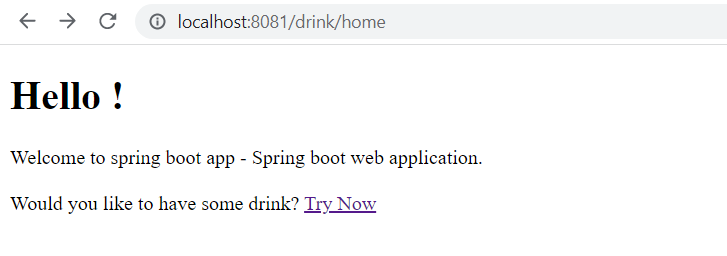
Now, let’s run the application and hit the below url from the browser
http://localhost:8081/drink/home
Below page should open
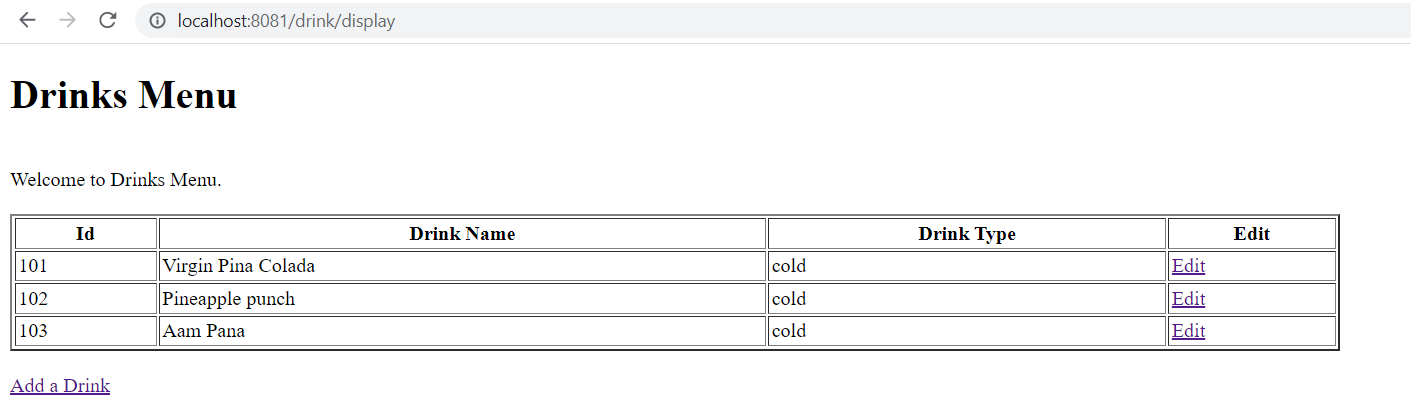
Drinks Menu Page :
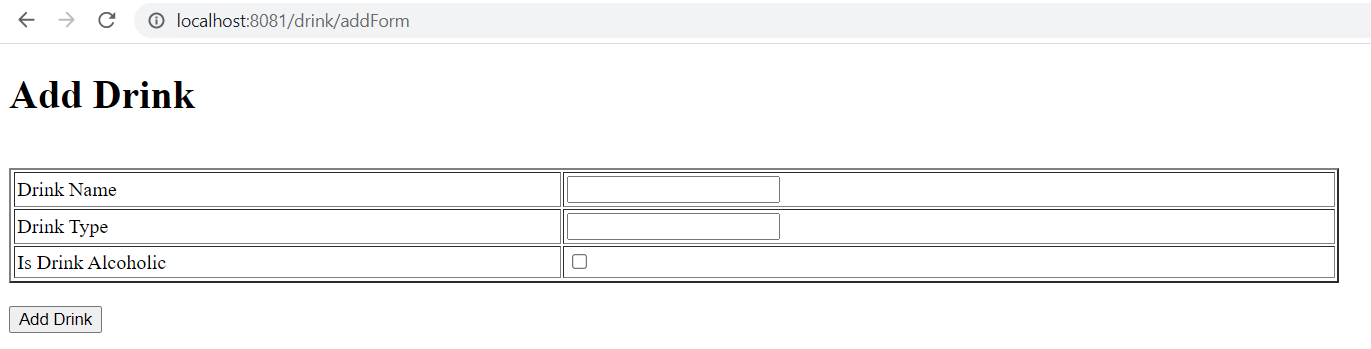
Add Drink Page :
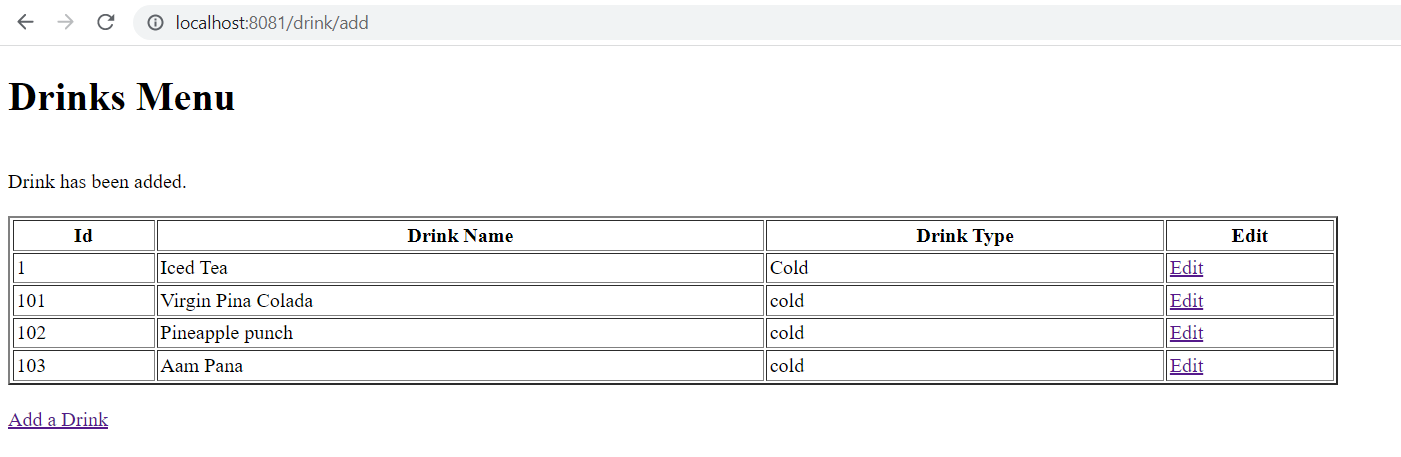
Drink Added Successfully Page :
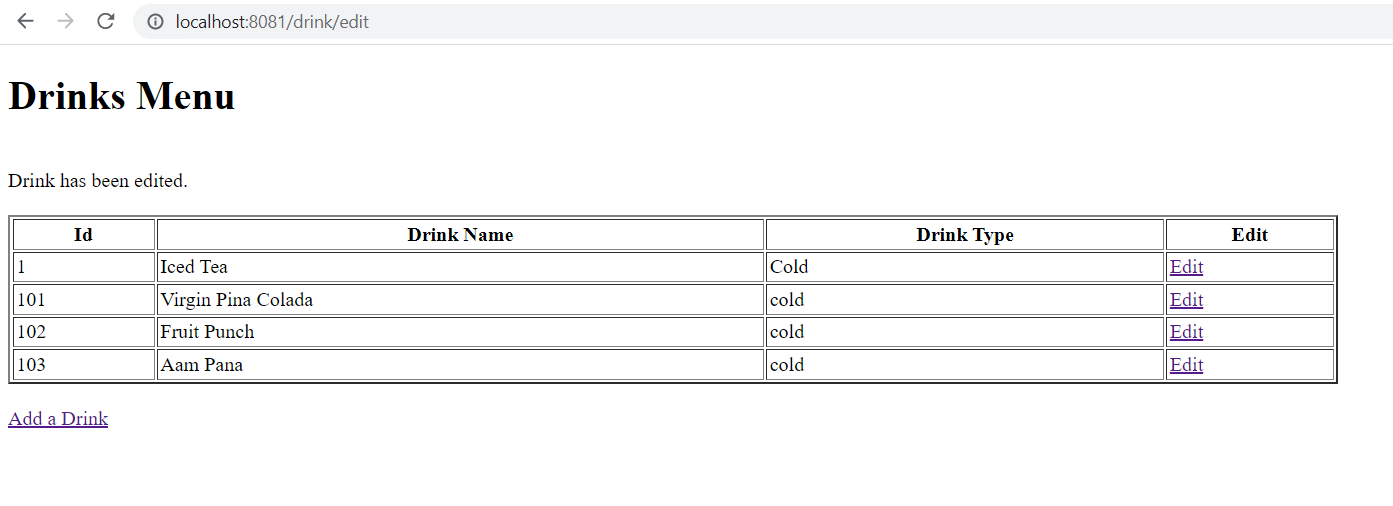
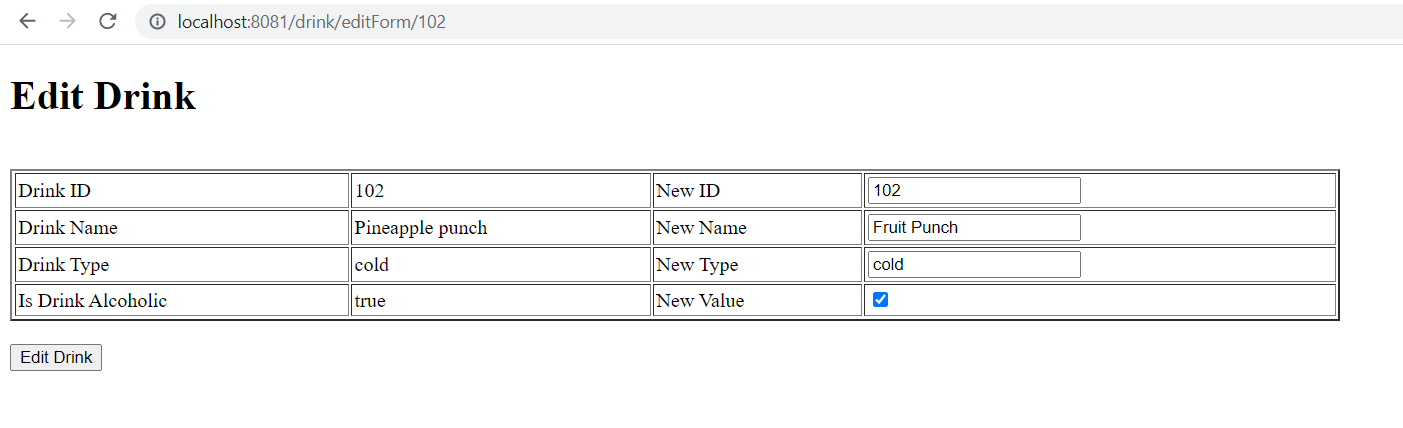
Edit Drink Page :
Drink Edited Successfully Page :