RequestDispatcher
RequestDispatcher interface is used for dispatching the request from one resource to another. The resource may be html, servlet or jsp. This interface can also be used to include the content of another resource also. It is one of the way of servlet collaboration.
There are two methods defined in the RequestDispatcher interface.
- public void forward(ServletRequest request,ServletResponse response)throws ServletException,java.io.IOException
- public void include(ServletRequest request,ServletResponse response)throws ServletException,java.io.IOException
Getting RequestDispatcher Object
RequestDispatcher object can be get from the httpServletRequest object by calling getRequestDispatcher() method.
RequestDispatcher rd = request.getRequestDispatcher("servletTwo");
//Here servletTwo is the url-pattern of the servlet where we want to dispatch the request
forward() and include() method
RequestDispatcher has two methods : forward and include
forward() method completely forwards the request to the next resource to process. Whereas include() method also forwards the request to the next resource, but it also includes the response from the current resource in the final response from the next resource.
RequestDispatcher rd = request.getRequestDispatcher("servletTwo");

rd.forward(request, response);

rd.include(request, response);
RequestDispatcher Example
Step 1 : Create a maven web project using maven archetype maven-archetype-webapp. If you want to learn how to create a dynamic web project using maven, click here.
Step 2 : pom.xml
<project xmlns="http://maven.apache.org/POM/4.0.0"
xmlns:xsi="http://www.w3.org/2001/XMLSchema-instance"
xsi:schemaLocation="http://maven.apache.org/POM/4.0.0 https://maven.apache.org/xsd/maven-4.0.0.xsd">
<modelVersion>4.0.0</modelVersion>
<groupId>com.javatrainingschool</groupId>
<artifactId>my-first-servlet-app</artifactId>
<version>0.0.1-SNAPSHOT</version>
<packaging>war</packaging>
<dependencies>
<dependency>
<groupId>javax.servlet</groupId>
<artifactId>javax.servlet-api</artifactId>
<version>4.0.1</version>
<scope>provided</scope>
</dependency>
</dependencies>
<build>
<plugins>
<plugin>
<artifactId>maven-compiler-plugin</artifactId>
<version>3.8.1</version>
<configuration>
<source>1.8</source>
<target>1.8</target>
</configuration>
</plugin>
<plugin>
<artifactId>maven-war-plugin</artifactId>
<version>3.2.3</version>
</plugin>
</plugins>
</build>
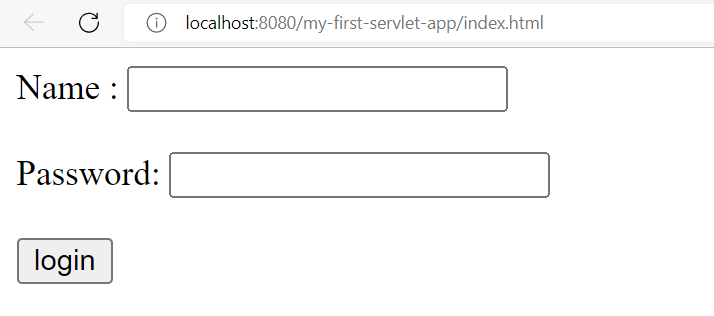
</project>Step 3 : index.html
<form action = "login" method = "post">
Name: <input type = "text" name="userName"/><br/>
Password: <input type = "password" name = "userPass"/><br/>
<input type = "submit" value = "login"/>
</form>
Step 4 : LoginServlet.java
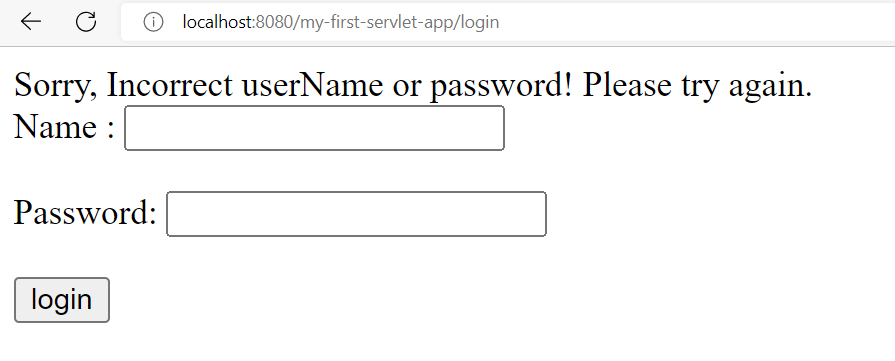
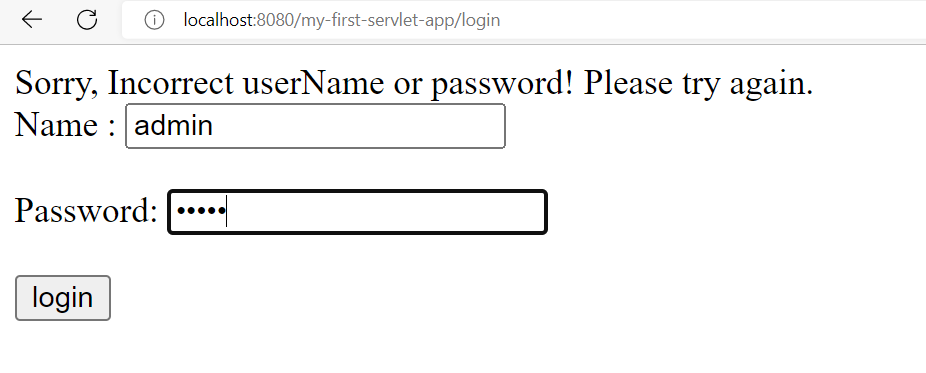
In LoginServlet, we are checking if username and password is ‘admin’, then we are forwarding the request to welcomeServlet. Else, we are redirecting the request to the index.html again with including a message that ‘Sorry, Incorrect userName or password! Please try again.’
package com.javatrainingschool;
import java.io.*;
import javax.servlet.*;
import javax.servlet.http.*;


public class LoginServlet extends HttpServlet {

public void doPost(HttpServletRequest request, HttpServletResponse response)
        throws ServletException, IOException {

    response.setContentType("text/html");
    PrintWriter out = response.getWriter();

    String name = request.getParameter("userName");
    String password = request.getParameter("userPass");

    if(name.equalsIgnoreCase("admin") && password.equals("admin"){
        RequestDispatcher rd = request.getRequestDispatcher("welcome");
        rd.forward(request, response);
    }
    else{
        out.println("Sorry, Incorrect userName or password! Please try again.");
        RequestDispatcher rd = request.getRequestDispatcher("/index.html");
        rd.include(request, response);
        }
    }

}
Step 5 : WelcomeServlet.java
package com.javatrainingschool;
import java.io.*;
import javax.servlet.*;
import javax.servlet.http.*;
public class WelcomeServlet extends HttpServlet {
public void doPost(HttpServletRequest request, HttpServletResponse response)
throws ServletException, IOException {
response.setContentType("text/html");
PrintWriter out = response.getWriter();
String name = request.getParameter("userName");
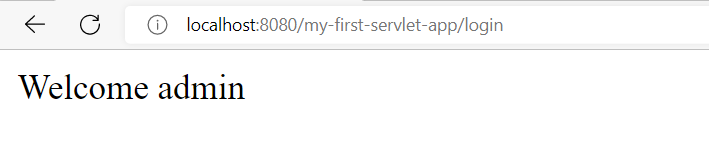
out.print("Welcome " + name);
}
} Step 6 : Provide servlet mappings for LoginServlet and WelcomeServlet in web.xml
<web-app>
 <servlet>
    <servlet-name>loginServlet</servlet-name>
    <servlet-class>com.javatrainingschool.LoginServlet</servlet-class>
  </servlet>
  <servlet>
    <servlet-name>welcomeServlet</servlet-name>
    <servlet-class>com.javatrainingschool.WelcomeServlet</servlet-class>
  </servlet>


  <servlet-mapping>
    <servlet-name>loginServlet</servlet-name>
    <url-pattern>/login</url-pattern>
  </servlet-mapping>
  <servlet-mapping>
    <servlet-name>welcomeServlet</servlet-name>
    <url-pattern>/welcome</url-pattern>
  </servlet-mapping>

  <welcome-file-list>
   <welcome-file>index.html</welcome-file>
  </welcome-file-list>
</web-app>
Step 7 : Deploy and run the server and test the application.
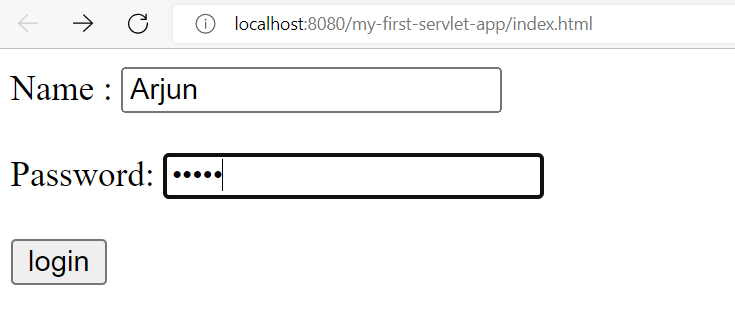
Step 8 : Enter any username other than ‘admin’
Step 9 : Enter username and password as ‘admin’
The output should be as below