Generate SSH keys and add to GIT Bash
Step 1: Download and install git from the below link
https://git-scm.com/download/win

Step 2: Open gitbash and go to the folder where you want to keep your ssh keys

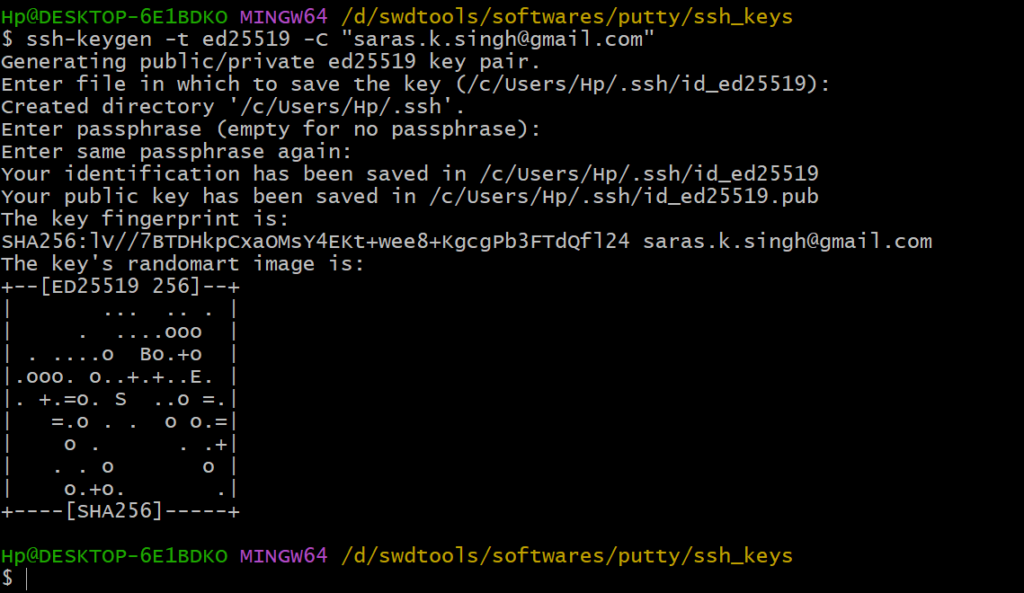
Step 3: Run the below command to generate private/public key pair
ssh-keygen -t ed25519 -C "[email protected]"Press enter to accept the default file name and location. Or if you want to give any specific name and location, then you can do so as well.
Here I am accepting the default name and location by simply clicking on ‘Enter’ button.

Step 4: It will then prompt for a passphrase. You can choose any passphrase(like a password). In this example, I am entering it changeit
Reconfirm it by entering the same passphrase again. After it is successful, below screen should appear

Add SSH key to ssh-agent
Now this key is to be added to ssh-agent.
Step 5: Start ssh-agent by running below command
eval $(ssh-agent -s)
Step 6: Change your directory to where ssh keys have been stored

Step 7: Run below command to add the ssh private key
ssh-add id_ed25519It will ask for the passphrase. Enter it. In this case, I am entering changeit
If successfully done, you should get below message

Add public key to github account
As the next and final step, we need to add the public key to the github account. If you don’t have one already, create one by signing up with the same email address that you used to create the ssh keys in the above steps.
Step 1: After logging into your github account, go to settings as shown below

Step 2: Click on the ‘SSH and GPG keys’ menu as shown below

Step 3: Click on ‘New SSH Key’ button

Step 4: Go to the directory where you have saved your private/public key pair

Step 5: Open the public key(file with .pub extension) with notepad or notepad++ and copy its content

Step 6: Now, go to GitHub account and enter the value copied as shown below. Title of the key can be given according to the choice. In this example, it is given as myKey
Click on ‘Add SSH key’ button.

Step 7: Upon successful completion, it will look like below
